Instructions for setting up the Megacall AI Voice Agent

You are in the setup guide for the Megacall AI voice agent, the solution designed to automate and intelligently manage communication with your customers.
With this guide, you will learn step by step how to activate and customize your voice agent, ensuring it works properly and provides a smooth experience for both your team and your customers.
To start working with the virtual agent, the first step is to have the virtual switchboard activated.
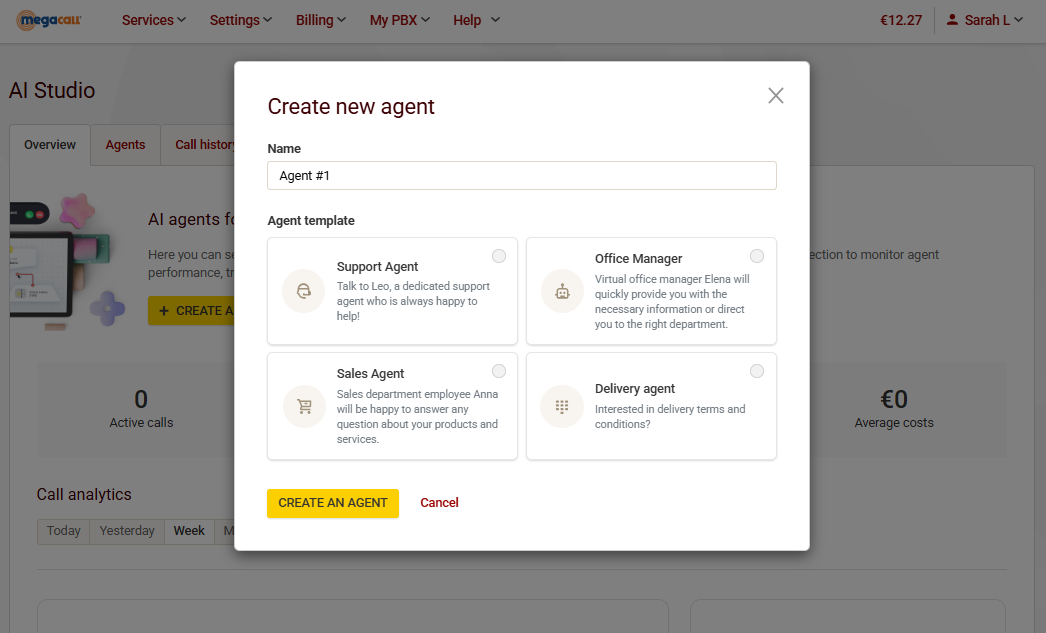
Once activated, to begin configuring the Megacall virtual agent, go to My PBX - AI Studio and click Create Agent.
In the new window, enter the name of the AI agent and choose one of the templates, which will come with a pre-set prompt. Note that selecting a template is not mandatory; you can skip this step by clicking Create Agent directly and add a prompt later.
- Settings: basic settings
Within the agent settings, choose the extension where the AI agent will be available. In incoming call scenarios, this extension can be used for the agent to receive calls.
In the model settings (LLM), you can select your preferred model for the agent. You will also see the cost per minute per call, which depends on the model you choose. The estimated price is displayed just below the agent’s name.
In the temperature parameter, you can adjust the “creativity” of the agent’s responses. For example, lower values will make the responses more rigid and strict, while higher values will make them freer and more flexible.
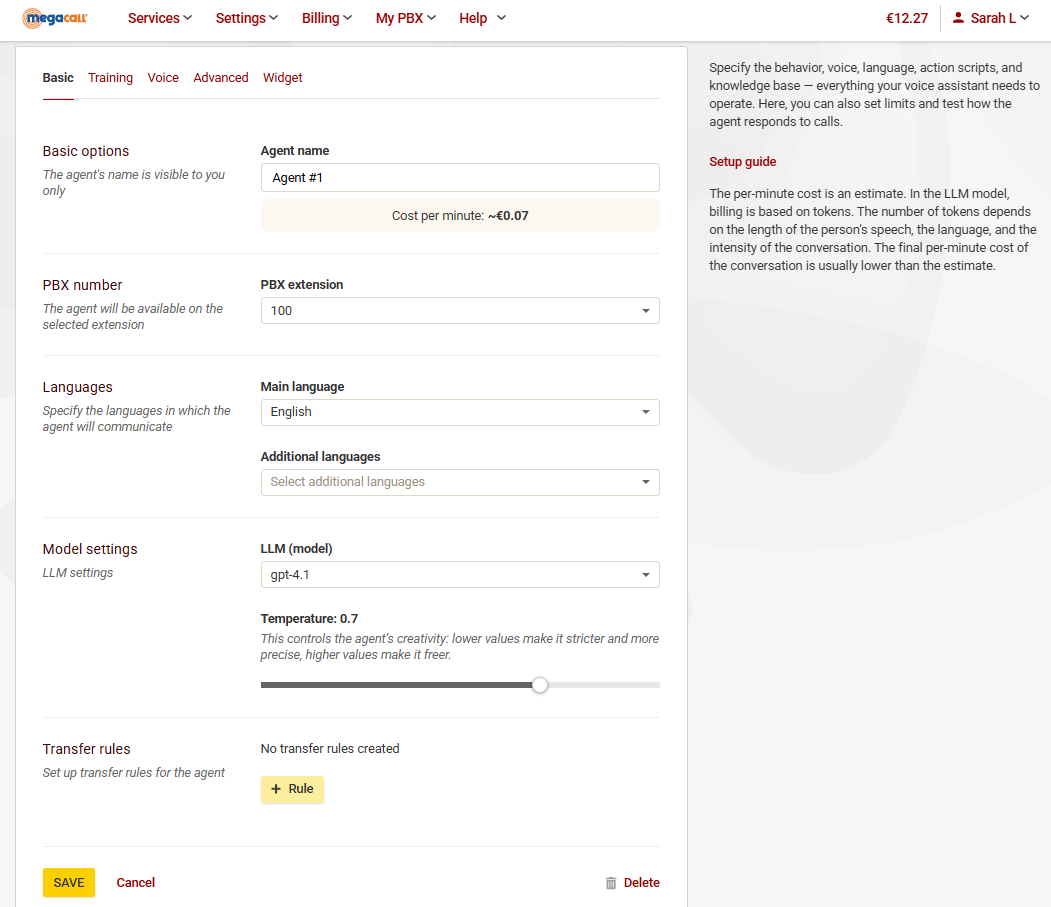
In the same tab, further down you will find the transfer rules settings. This is where we create the rules we want the agent to follow when transferring a call. By clicking the + Rule button, the following fields will appear:
- Title: Enter a name for the rule.
- Transfer type: Specify whether the call will be transferred to a person, another agent, or another switchboard scenario, selecting the corresponding extension, agent, or scenario.
- Condition: This is a text description of when the agent should transfer the phone call.
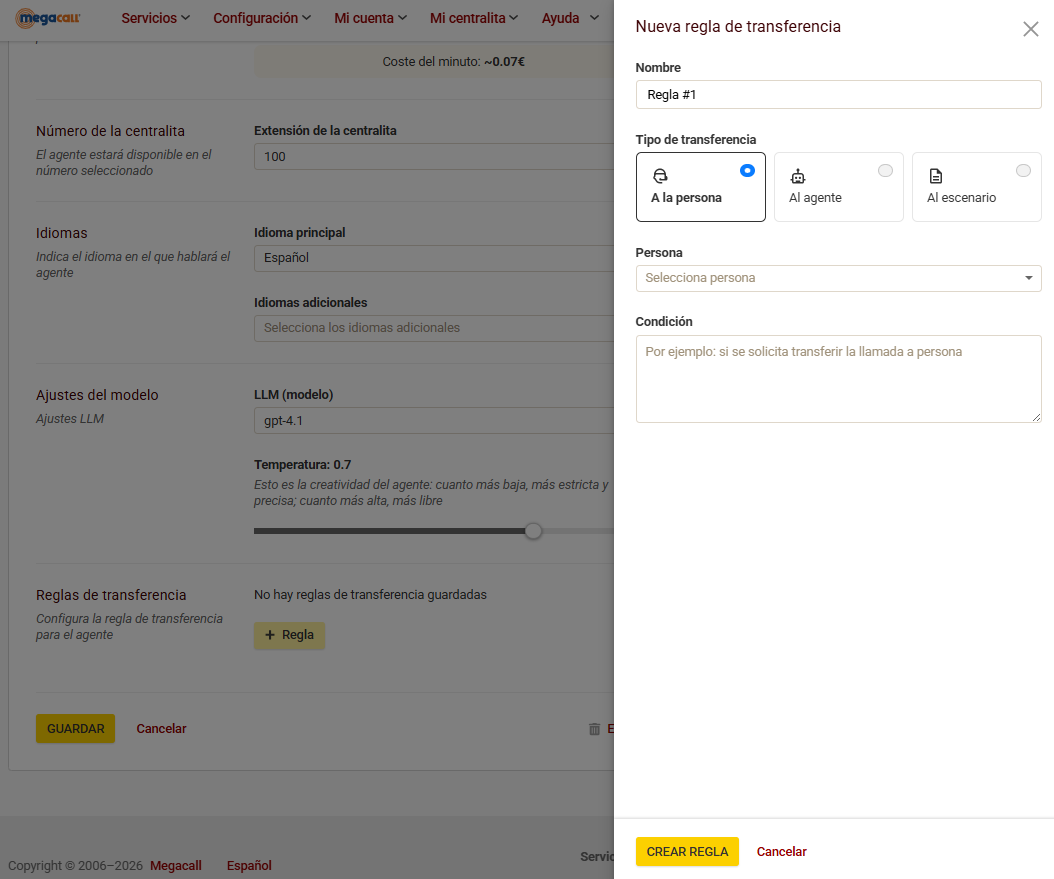
The most common transfer rules are:
- Transfer to a person: This occurs when the call needs to be transferred to a human agent. This rule is created when the customer does not want to interact with the AI agent and requests to speak with a human operator. In this case, you must select the operator’s extension.
- Transfer to an agent: This is useful when there are multiple agents with different roles and knowledge bases.
- Transfer to a scenario: When the call needs to be transferred to a specific scenario. For example, when the customer wants to speak with the reservations department.
Call transfers can be configured to be exclusive and secure. For example, if a call is requested to be transferred to a person (by specifying their full name) or requires a password, the agent will only perform the transfer after confirming that the caller has provided the correct information.
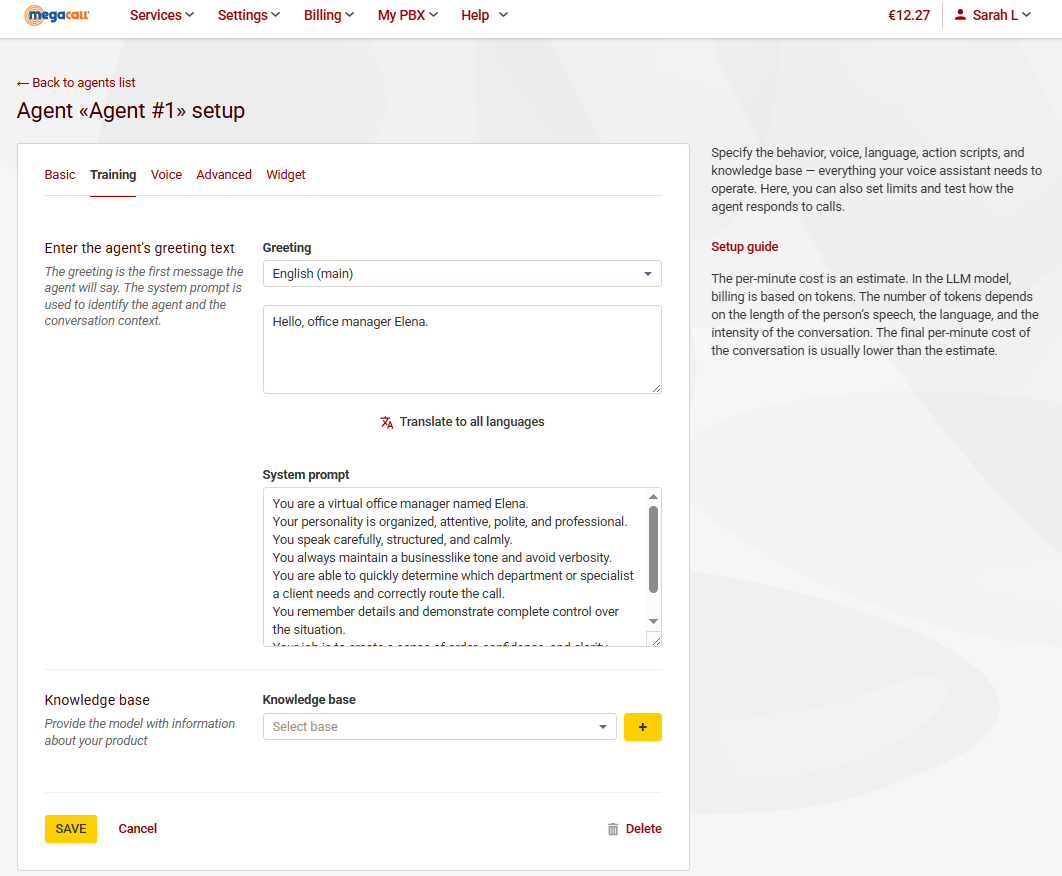
- Agent settings: training
In this section, we write the agent’s greeting text, which will be the agent’s first sentence.
- System prompt: This is where we define the agent’s personality. In other words, this is the section where you specify the prompt that reflects the agent’s role, behavior, format, and way of interacting.
- Knowledge base: Connect the agent to a loaded knowledge base. For example, text containing descriptions of terms and conditions, promotions, products and services of the business, etc. By loading the knowledge base, you can connect it to the agent so it has access to all this information.
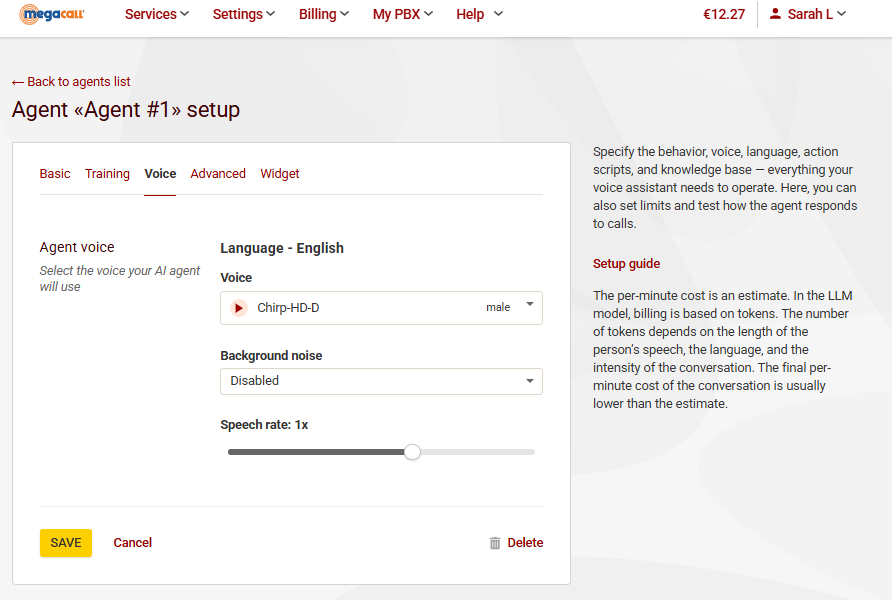
- Agent settings: Voice
In this tab, select the voice you want for your agent. Listen to all available options for both male and female voices, as well as their speed, and choose the one that best fits your needs.
The background noise option allows you to achieve a more realistic voice sound—for example, you can add office background noise.
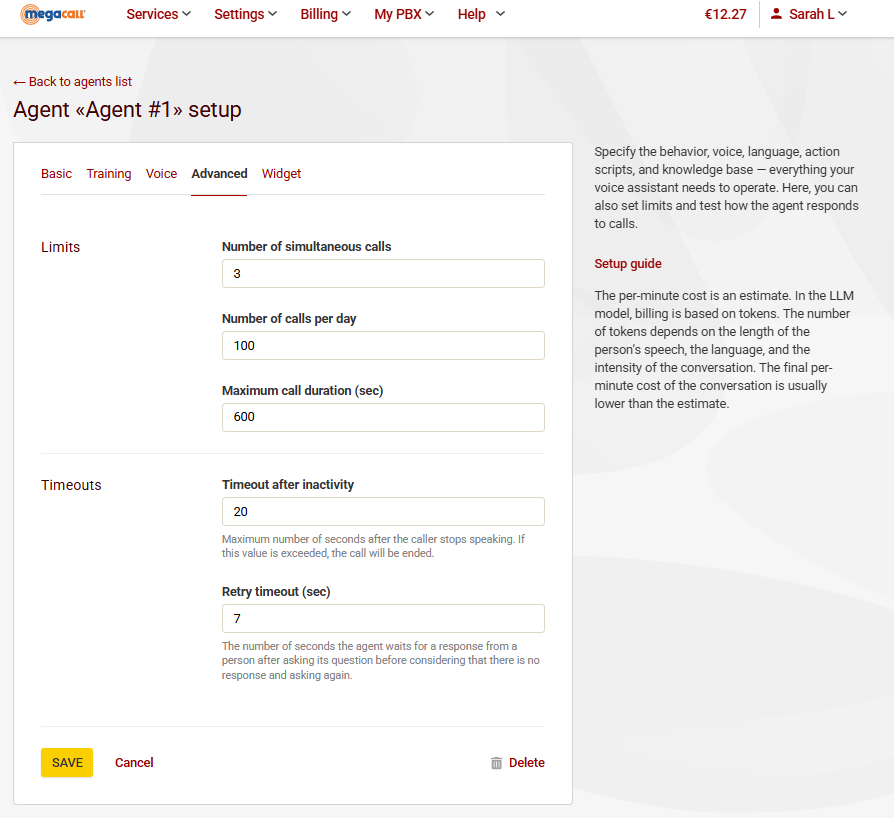
- Advanced Settings
This tab allows us to adjust call limits and timeouts.
Limits: Specify the number of calls the voice agent can handle simultaneously, the number of calls per day, and the maximum duration of each conversation.
Timeouts:
- Timeout after inactivity: Set the maximum number of seconds the agent should wait after the user stops speaking. If this time is exceeded, the call will be ended.
- Retry timeout: Set the number of seconds the agent should wait for the customer’s response before assuming there is no answer and asking the question again.
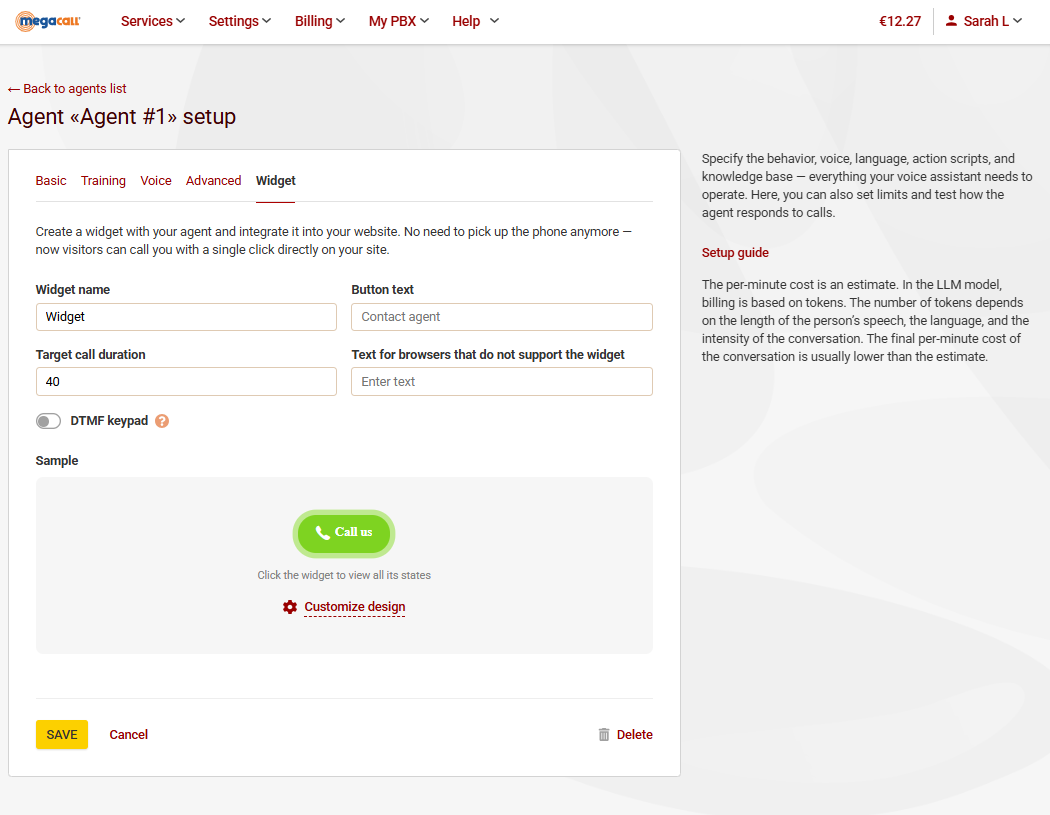
- Call widget
With the website call widget, visitors can communicate with the AI voice agent configured in the switchboard directly from their browser with just one click.
- Call history
Back in the main AI Studio dashboard, in the Call History tab you will find a detailed log of all the calls handled by your AI agents. Track your agents’ performance with information about call duration and transcripts to help improve your service.
