
Connecting Megacall with Zapier will allow you to automate tasks and improve call management. With this integration, you can sync your PBX with hundreds of applications, enhancing your workflow and customer communication at the same time.
Megacall – Zapier Integration features
- Integration with call notifications for both incoming and outgoing calls. For example, call start, answer, end of call, or missed call.
- Ability to transfer call recordings.
- Option to set up callback calls from different events on the Zapier platform.
- Transfer of incoming and outgoing SMS through Zapier.
Megacall CRM Integration features
- Add and update a lead.
- Add and update a customer.
- Add information to the customer profile.
- Add and update tasks.
- Possibility to integrate with Facebook Messenger.
For the integration with Zapier, you need to create an account on their platform.
Some examples of Megacall integrations with Zapier are:
Communication channel configuration (Megacall CRM – Zapier – Facebook Messenger)
For this integration, your company’s Facebook page must first be created with the message-sending button enabled for customers. This way, Megacall CRM will generate a lead when a customer sends a message, allowing you to continue the conversation from the platform.
Message transfer between Megacall CRM, Zapier, and Facebook Messenger.
- First, log in to your personal Zapier account.
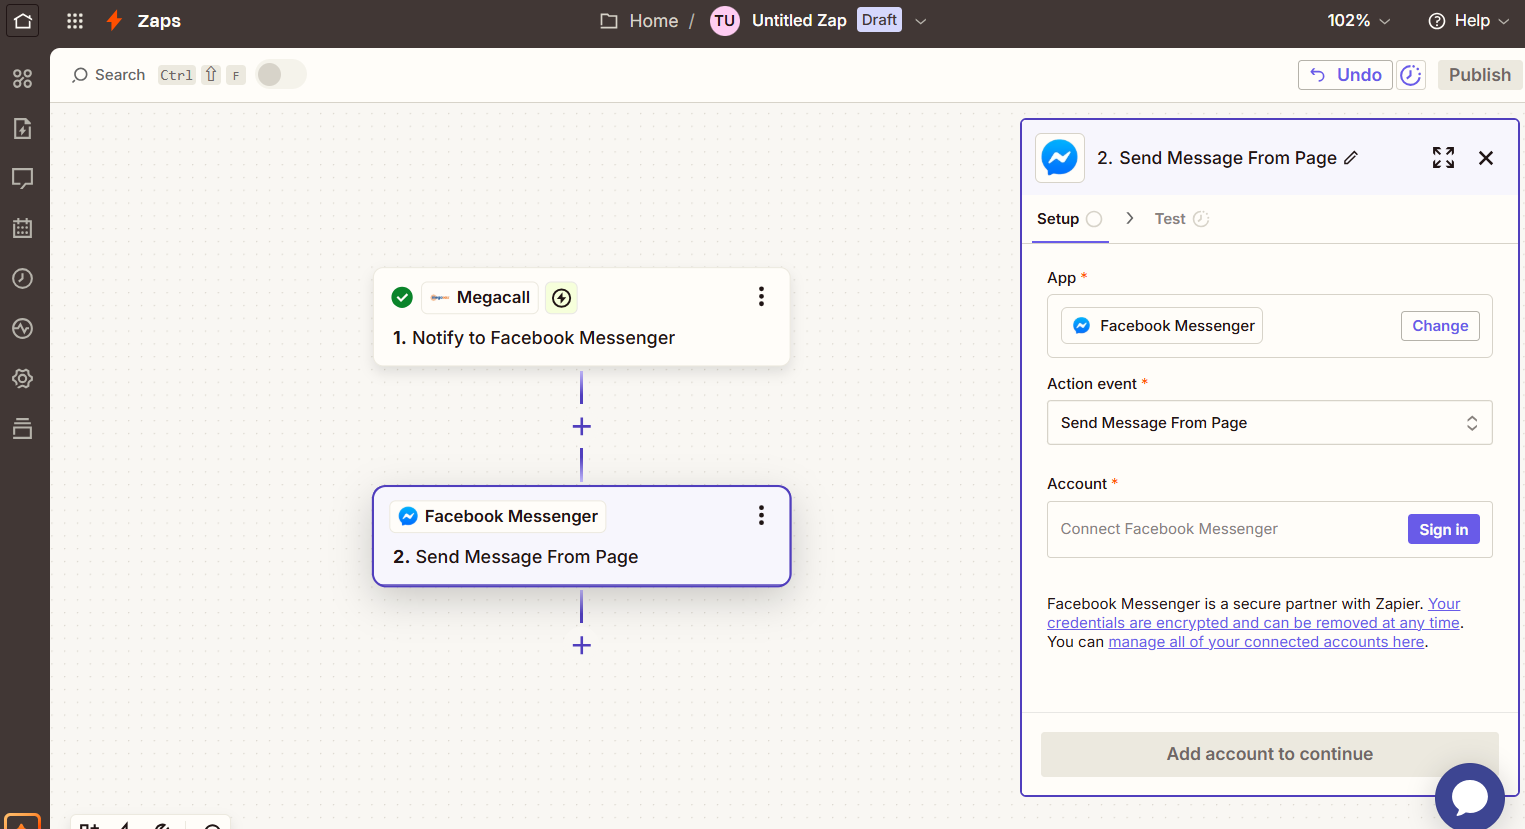
Select Create – Zaps, then in the Trigger section, search for and select the Megacall application.
In the Event field, select the trigger event “Notify to Facebook Messenger” and click Continue.
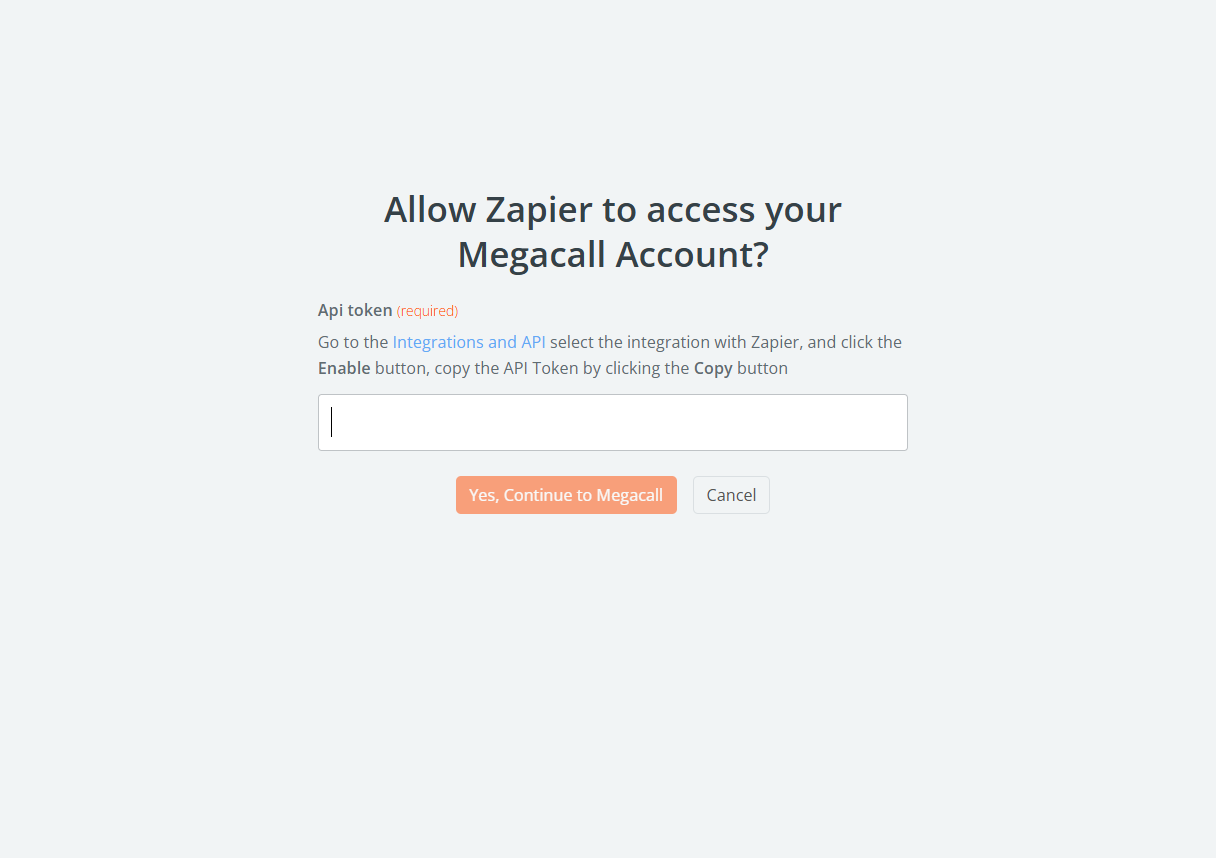
In the Account field, log in, and a new window will open where you need to insert the token to connect to your Megacall account. To obtain the token, go to your Megacall personal area, navigate to Integrations and API, and activate the Zapier integration.

In the new window, paste the token and click “Yes, continue to Megacall,” then click Continue again in the Zapier settings window.
In the Test tab, select Test Trigger, and once completed, click Continue with selected record.
- In the next window, search for the application for the Action tab, which in this case will be Facebook Messenger.
In the Event field, select the action “Send Message from Page” and click the Continue button.
Again, in the Account field, log in with your Facebook account and then click Continue.
Once done, for the Action tab, enter the following values:
- Page: select your Facebook page.
- Recipient ID: PSID (page-scoped user ID).
- Text: Message text.
After entering the values, click Continue.
For the Test tab, click Skip test, and then click Publish. The Zap will have been successfully created. You can close it and proceed to the next step of the configuration.
- Go back to Create – Zaps. In the Trigger field, search for the Facebook Messenger application and select it.
In the Event field, select the event that will trigger the action: “New Message send to Page”, then click Continue.
In the Account field, log in with your Facebook account.
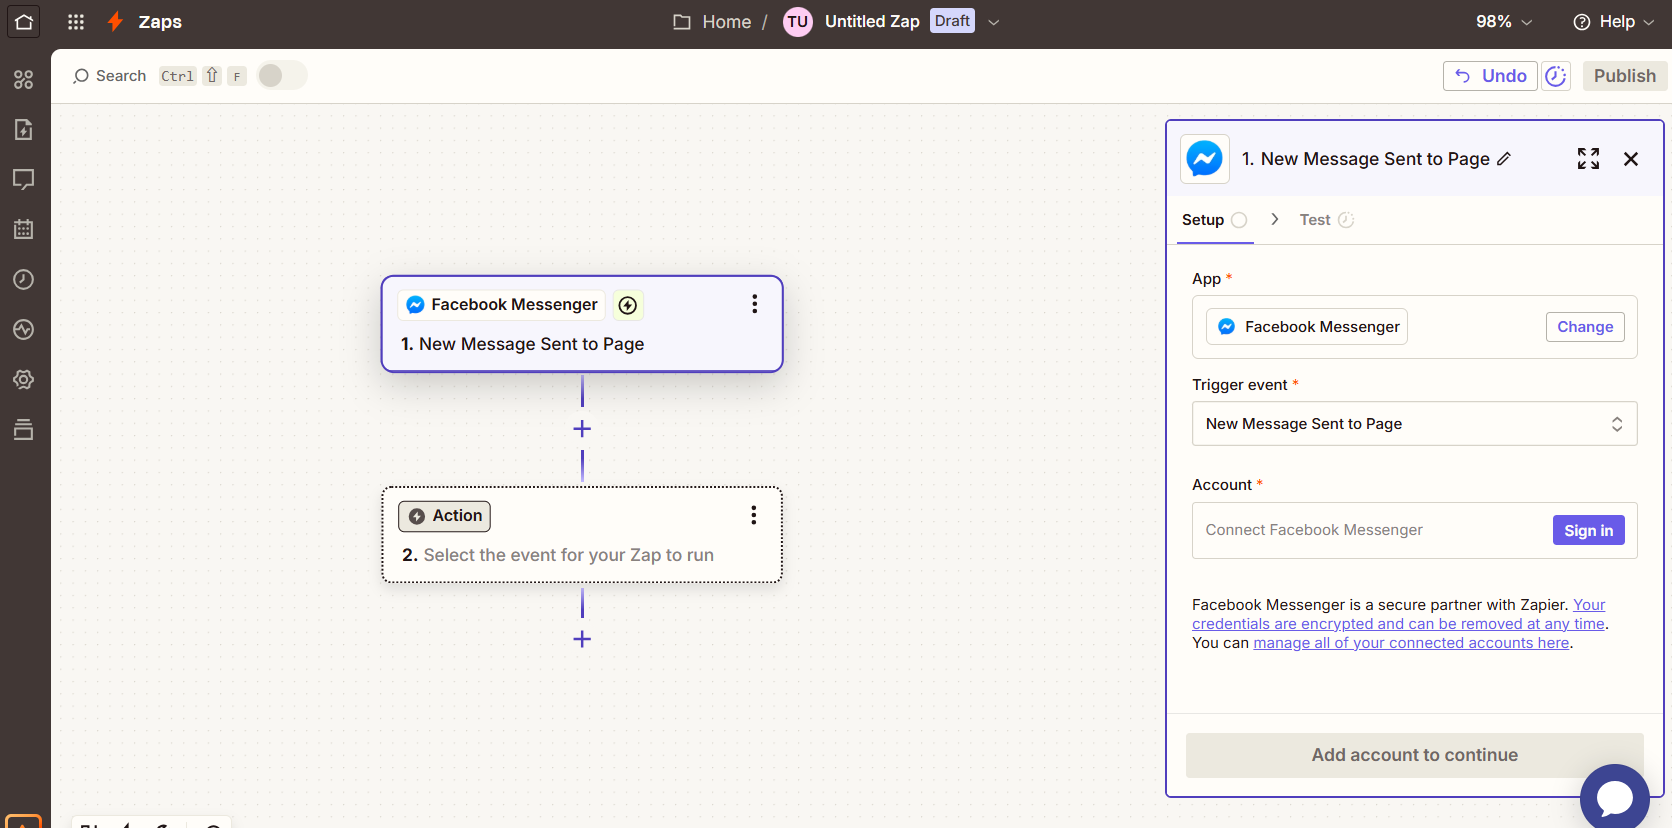
In the Trigger tab, select your Facebook page in the Page field and click Continue.
In the Test tab, select Test trigger – Skip test – Continue.
- In the next window, select the application for the Action tab, which will be Megacall.
In the Event field, select the action Send Message to Page from Facebook Messenger and click Continue.
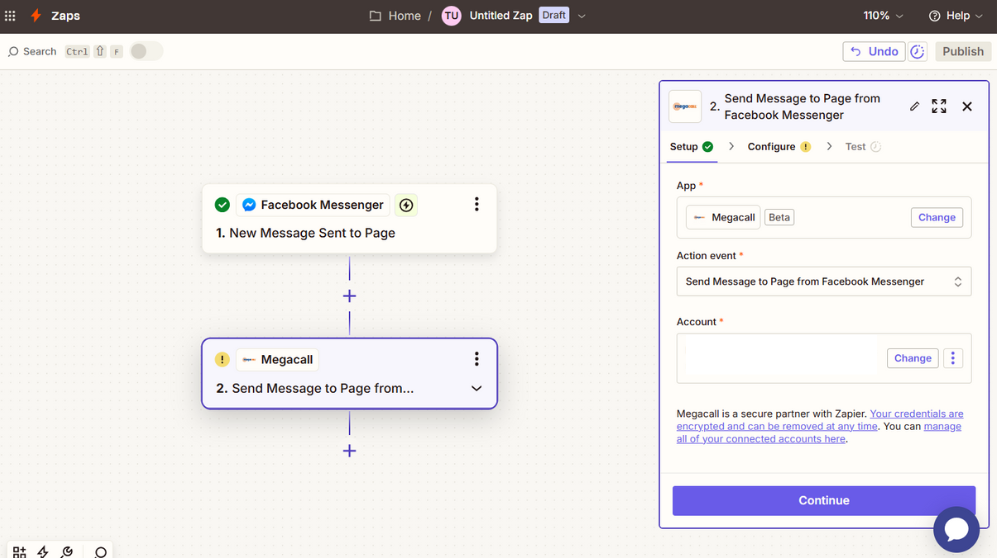
Select the account and click Continue, then in the Actions tab, enter the following values:
- Facebook Messenger PSID: Sender Psid
- Message text: Message text
- Sender full name: Sender full name
- Time: time
After entering the values, click Continue. Finally, click Skip test and then Publish.
The Zap will now be published. You can ensure both Zaps are activated from the Zap section on the left side of the panel. One Zap is for messages from Megacall to Facebook, and the other for messages from Facebook to Megacall. Once they are activated, the configuration is complete.
When a visitor sends a message on the Facebook page, a new lead will be created in Megacall CRM under the Raw section. Any CRM user can claim the lead and continue the conversation with the customer from the profile.
Integration with Gmail. Emails about missed calls from the virtual PBX.
- In the Megacall personal area, go to Settings – Integrations and API and activate the integration with Zapier
- Copy the generated Token.
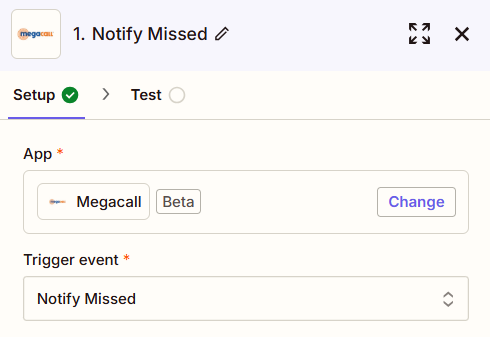
- Log in to your account on the Zapier platform. Click +Create – Zaps.
- Select Trigger, search for Megacall, and select the application.
- In the settings panel, select the event for the trigger, such as Notify Missed – Missed call notification.
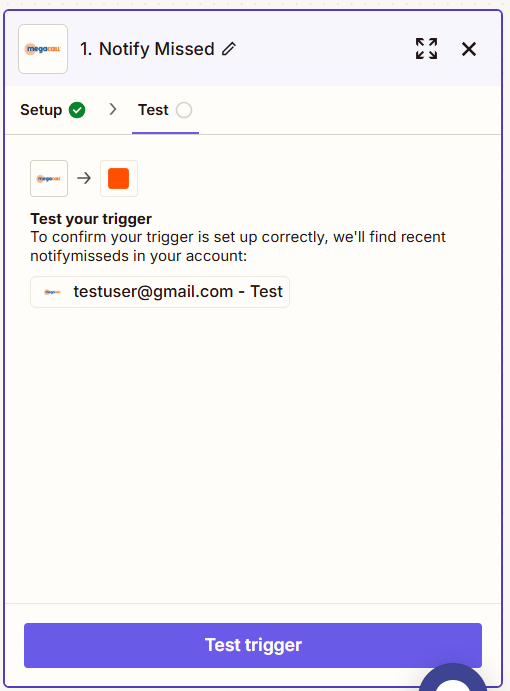
- In the next field, “Account”, add the account and insert the API Token from the Megacall personal area in the new window, then click “Yes”
- Click “Test trigger”.
- In the Actions section, search for and select the application that will receive the notification from the virtual PBX, in this case, Gmail. For the Action, select Send Email.
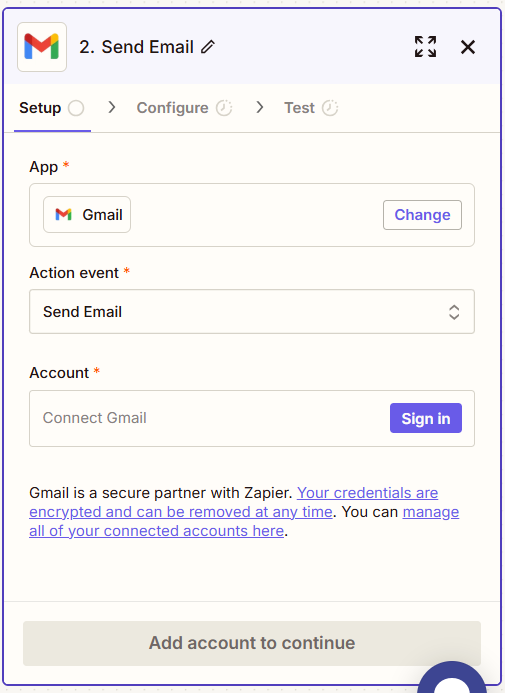
- In the next field, “Account”, log in to your Gmail account and then click Continue.
- Fill in the required fields, including details; recipient email, subject, body, and any other necessary values to complete the setup.
- To test the trigger, click Test Step, and to publish the Zap, select the “Publish” button.
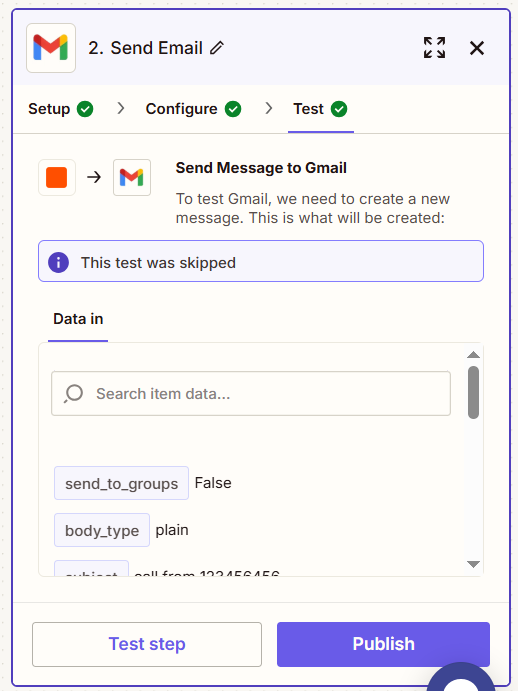
With this, the setup will be complete. The email will be sent to the specified email address with missed calls from the virtual PBX. You can also configure other actions in Gmail or in one of the 5,000 available applications on Zapier.
Sending SMS from the Zapier Platform
In the Megacall application on Zapier, the Send SMS function is available. The action can be triggered by any event in an external system, such as completing a form in Google Forms.
Here are the steps to follow:
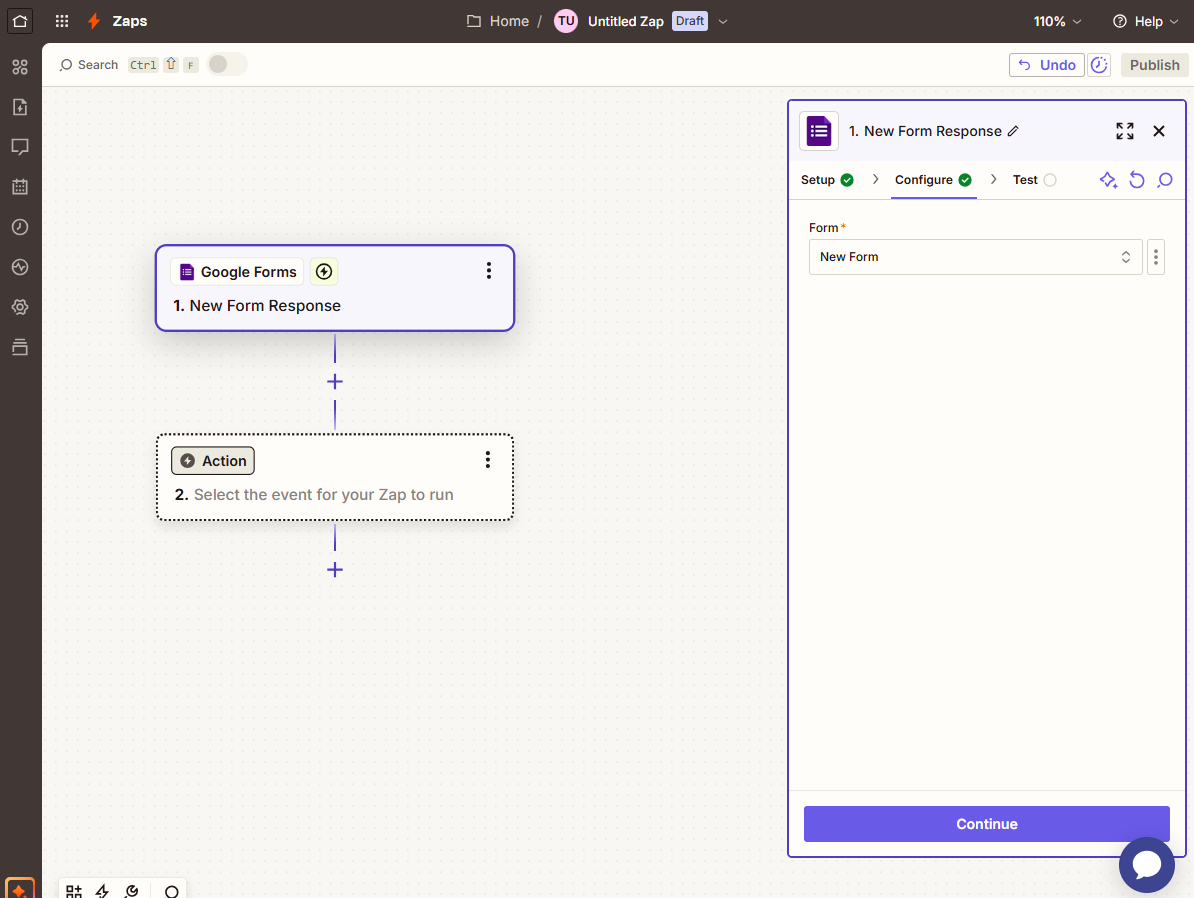
- First, log in with your personal account on Zapier. Once inside the platform, select Create – Zaps. In the Trigger section, search for Google Forms and select it.
In the Trigger Event field, choose the event that will trigger the action. For this case, it would be New Form Response.
In the Account field, log in with your Google account and click Continue.

In the Configure tab, enter the name of your Google Form in the Form field and click Continue.
In the Test tab, click the Test trigger button.
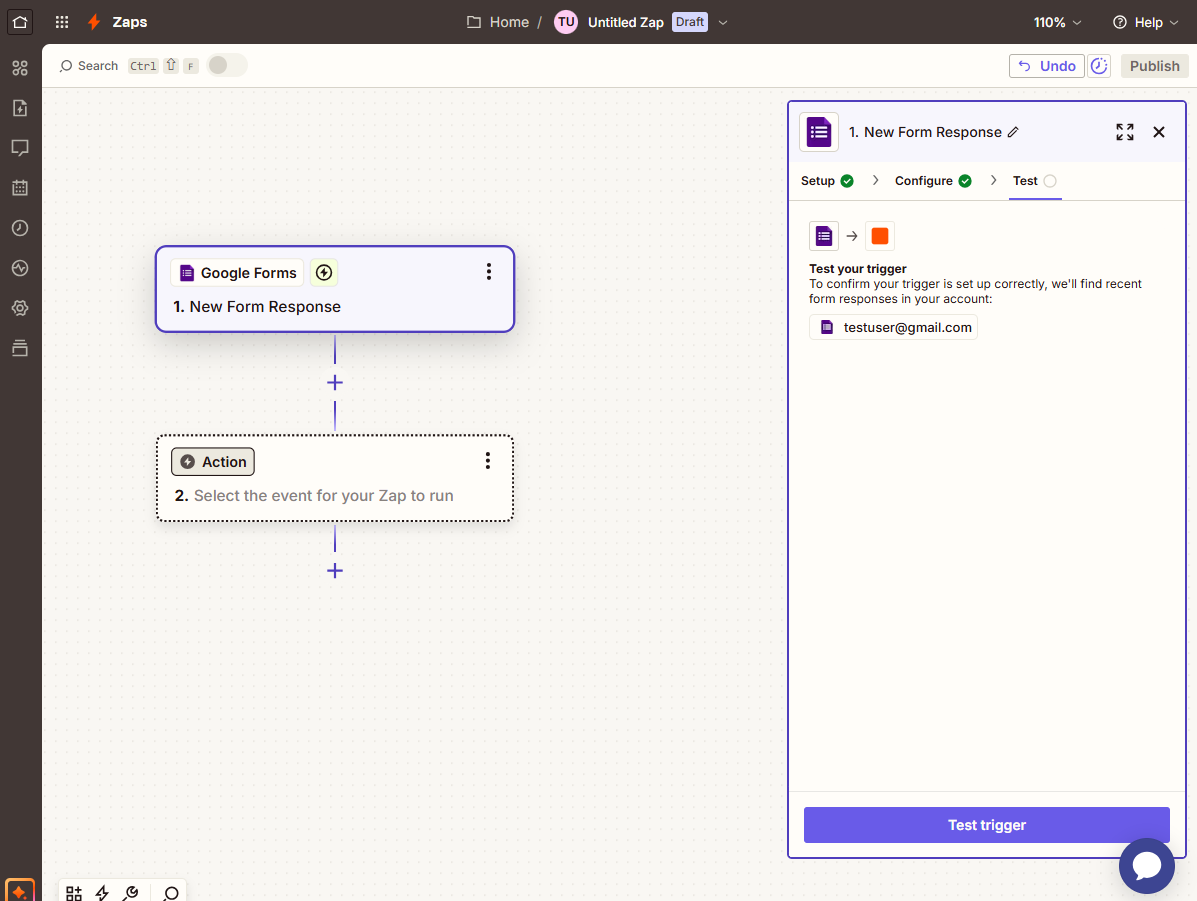
In the next screen, select Continue with selected record.
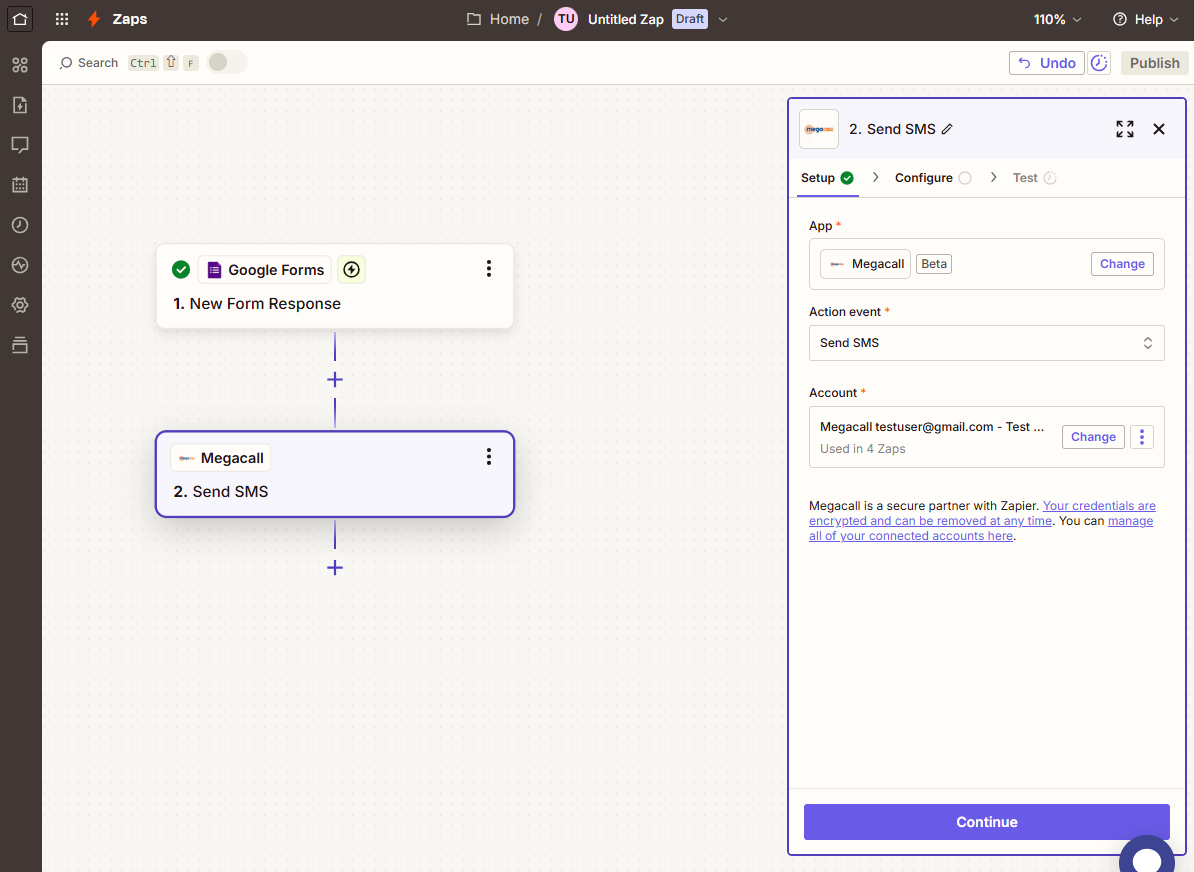
- In the new section, search for and select the Megacall application. Once selected, it will return to the settings section. In the Event field, select Send SMS. For the Account field, log in to your Megacall personal area.
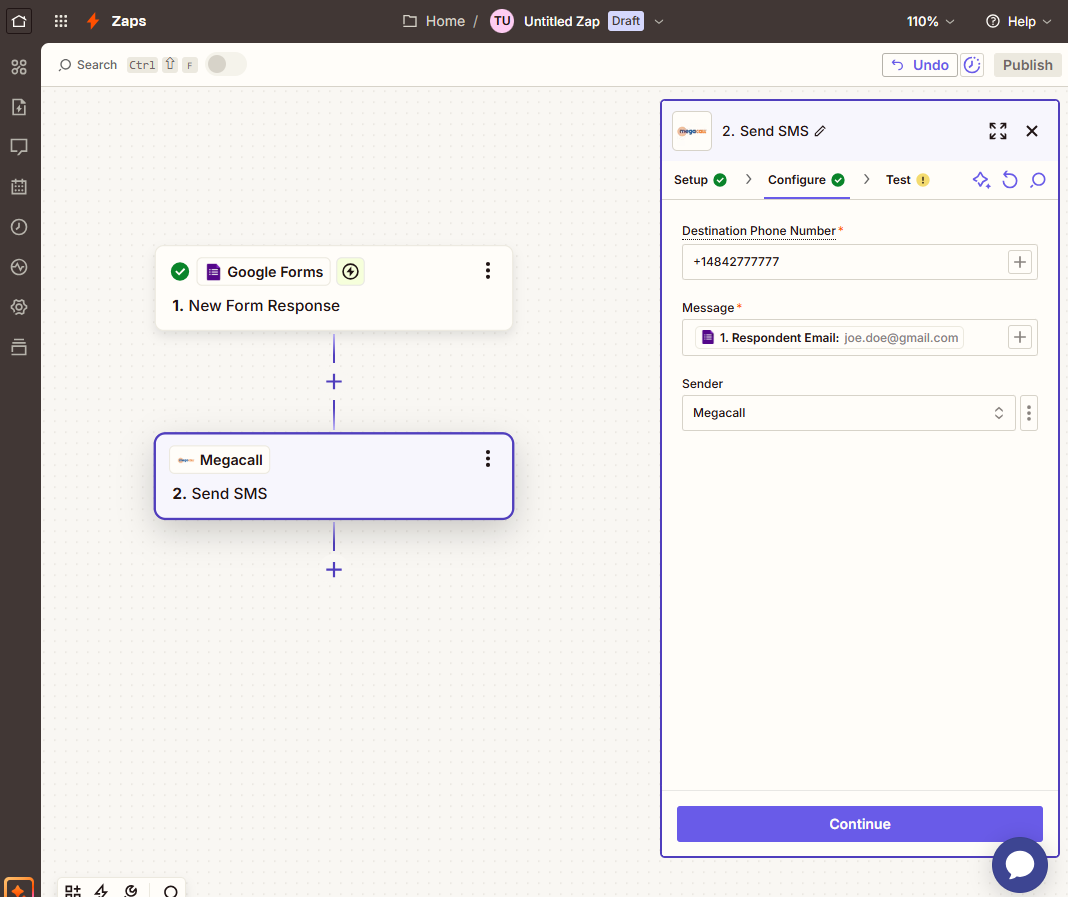
In the Configure tab, enter the phone number that will receive the SMS in the Phone number field.
For the Message field, specify which data from the Google Form will be included in the SMS.
In the Sender field, select the sender of the SMS, and finally, click Continue.
To verify the message sending, go to the Test tab. If everything is correct, click Publish to finalize.
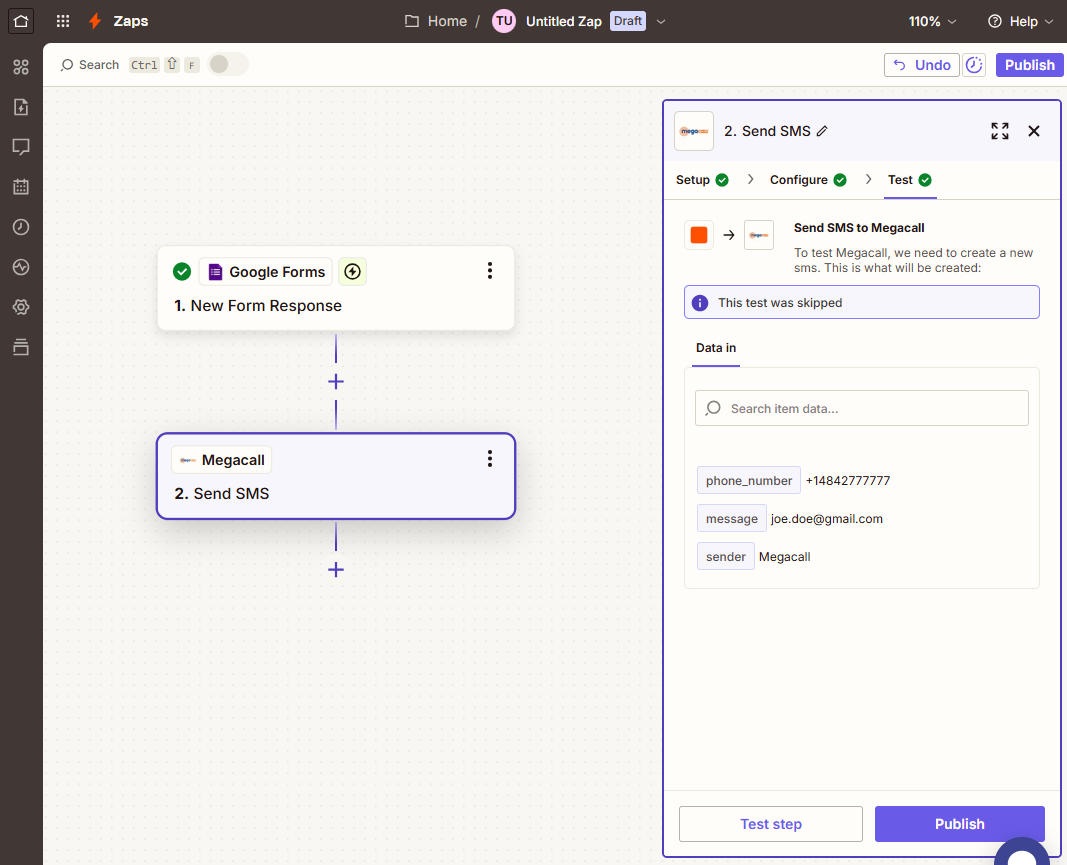
The configuration is now complete. From now on, when someone submits the survey in your Google Form, an SMS will be sent with the selected option. You can also choose which data from the Google Form will be transferred in the SMS.